10
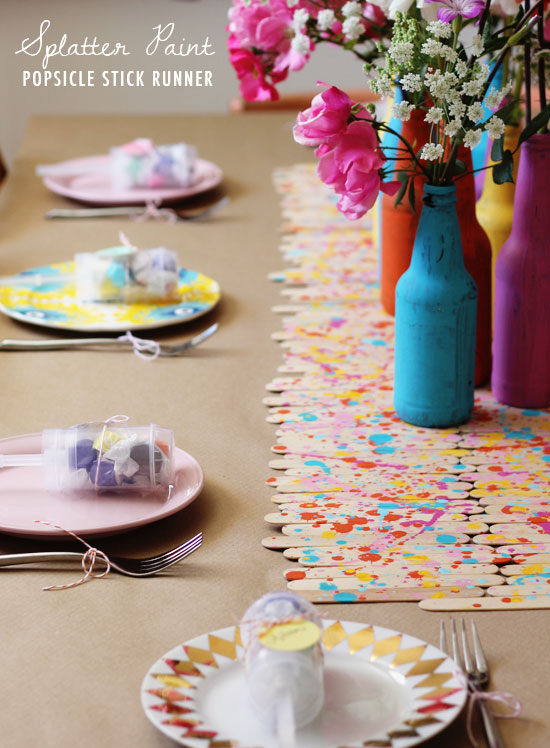
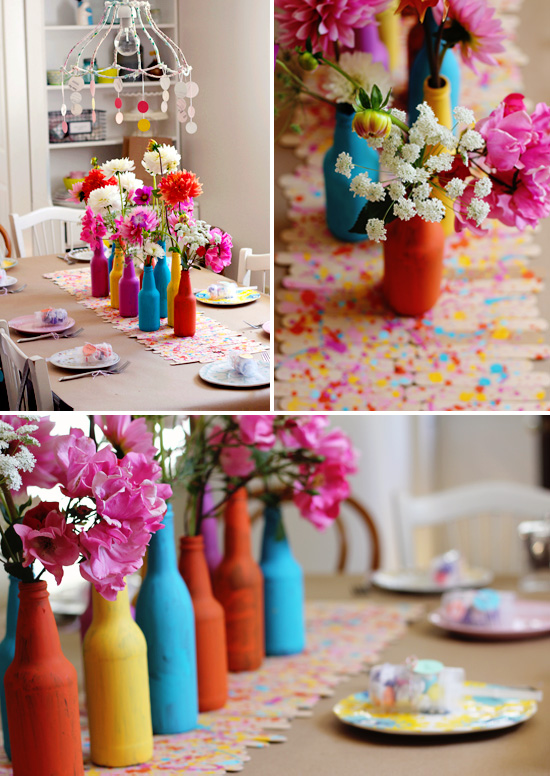
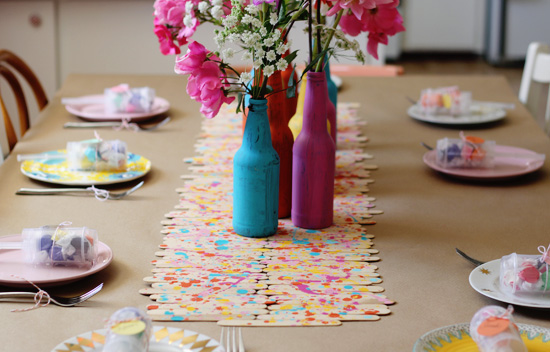
Last Saturday, I hosted a baby shower for my friend Jenn, who is having her first baby in September. It was a lot of fun to throw, and it turned out super cute! I planned it with my friends Ellen and Renae, who both posted about the shower on their blogs today too. Our theme was "about to pop," so we picked food and decor elements that had the word "pop" in them. We served lemon poppyseed cake, popsicles, white chocolate confetti popcorn, and soda pop, and for favors we put a push pop full of candy at each place setting. I painted soda pop bottles in our colors (pink, yellow, orange, and aqua), and we filled them with flowers from the farmer's market for the centerpiece. I loved how everything came together, but my favorite detail (which I'm sharing instructions for today) was the popsicle stick runner!
I was inspired by this runner, but instead of painting all the sticks individually, I decided to try splatter painting! It was a lot of fun, and a lot less time consuming than painting each and every popsicle stick. Plus, I think it fit the theme better.
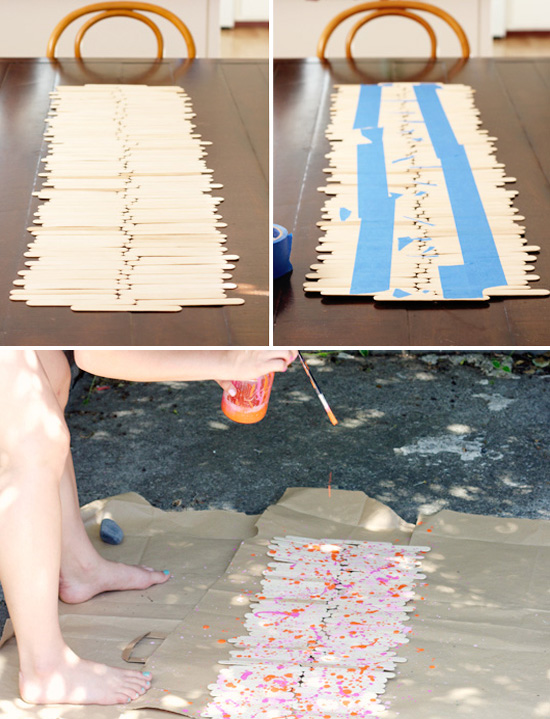
The first thing I did was to arrange the popsicle sticks on my table. I left room for a place setting at each end, and I purposely didn't line the popsicle sticks up perfectly. Once I had an arrangement I liked, I used blue painter's tape to connect them. I did long strips down each row, then little pieces of tape intermittently connecting the two rows. As you can see, I wasn't very scientific about this...it's the back side anyways. I set out lots of paper bags outside and laid my assembled runner on top of them (tape side down). I'd recommend laying down more paper than you think you'll need and wearing clothes that you don't care much about, because the paint will get everywhere!
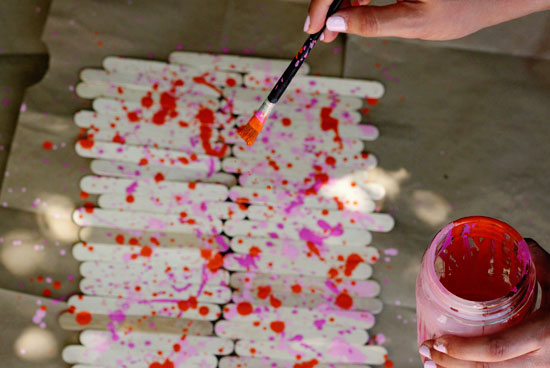
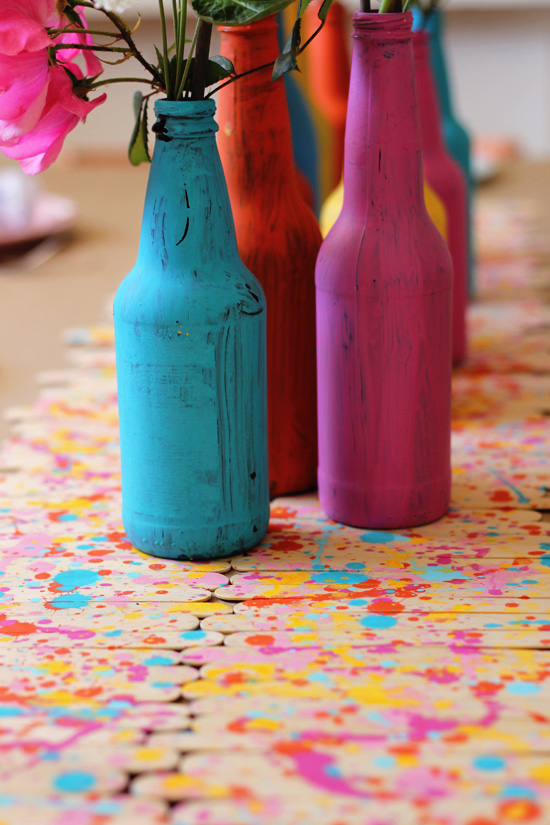
For the paint itself, I used acrylic paint diluted with a little bit of water to make it more runny. Don't add too much water--just a splash so that the paint will drip off the brush freely. The splattering part was super fun! It's supposed to look messy, so I just went for it and tried some different techniques. Holding the brush a few feet above the runner creates a nice round splash when the paint drips off. Flicking your wrist (a little closer to the runner) makes streaks that look like little comets. I think a mix of both methods worked well.
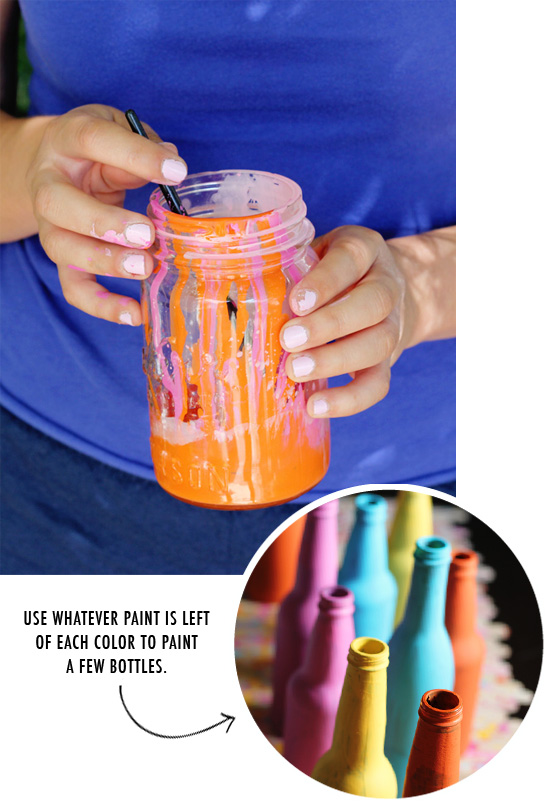
After I finished using each color for splattering, I painted a few soda bottles with the remaining paint in the jar. I liked how it left the bottles a little streaky and painterly.

On the day of the shower, we laid down kraft paper, then put the runner and bottles on top of that. We also made garlands (like the one on the back of the chair) by punching out circles from paint chips. It's kind of a genius idea, if I do say so myself...paint chips are free and you can get them in every color! We also hung some of the paint chip circles from my dining room light. You may remember my post on stripped shades--I finally put mine up! I decided to wrap it with fabric strips...for now anyways.
Have you ever tried splatter painting something? Even if you don't do a popsicle stick runner, I'd totally recommend giving splatter paint a try. I can see this looking awesome on pillows, a tablecloth, some dinner napkins, etc.
See more details from our shower (including our cute DIY onesies) in Renae's post and Ellen's post.


Thanks so much for the shower. It was awesome! Great photos, Aileen!
You're welcome :)
this is so colorful and fantastic!
kw ladies in navy
Wow! That table runner is awesome. What a great idea. All the decor, and the great sentiment from friends makes my heart so happy. A big thank you from Jenn's mom!
Aww, thanks Debbie! It was so much fun to put together, and we are all so excited for Jenn!
Such an ADORABLE shower! Love the theme, love the decor, and the table runner was a great touch.
Thank you!!
I am loving this! What a great idea - thanks for sharing. I might try to make a wall piece with this idea!
Ooh, something splatter painted would be fantastic on the wall!
I LOVE this DIY but mainly because last summer for 4-H I attempted a Popsicle stick table runner myself! I made mine glow in the dark and colorful like urs the reason I made it glow in the dark is because I wanted us to have a table runner when we go camping
So glow in the dark was just perfect for that. I did hot glue mine to felt though the only problem I face is storeing it can be difficult ...super cute btw!
Ooh, a glow in the dark runner--FUN! That's an awesome idea for camping.
super genial! A faire même avec la complicité des enfants. Matériel pas cher pour petit budget. Merci pour l'astuce
Love Love Love! What kind of bottles did you use?
Mostly empty soda bottles & salad dressing bottles...just whatever I had in recycling from the past few months!
So cute! I love this, splatter art is my fave! My daughters love using this every night they can manage it,
I love it but, my favorite version I made was one with colored popsicle sticks, you should try it!