13
One of the best things about blogging is “meeting” people all over the world who share your interests. I first came across Katy of Apartment Apothecary through this beautiful house tour that she posted (and I asked to share). I fell in love with her blog, and I’ve been following it ever since. Her style is similar to mine, and her own home is really inspiring. So when Katy asked if I’d like to share a DIY project she recently did, I knew I would love it. And I do! I’m excited for you all to see, and thought it would be best for you to get the instructions directly from Katy. So I’ll shut up now and let her take it from here!
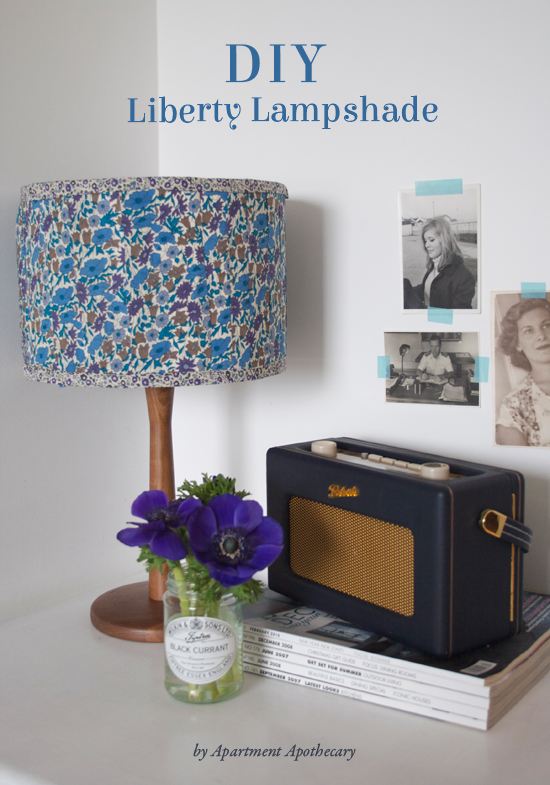
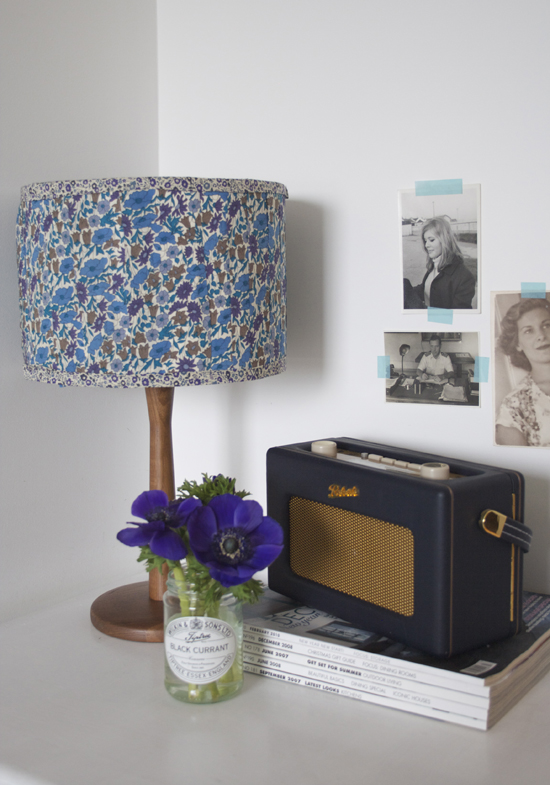
Hi! My name is Katy and I blog over at Apartment Apothecary. I love Aileen’s style and her blog is just beautiful so I am very excited to share a project here today. I live in London and my favourite store of all time is Liberty of London; I am a self-confessed Liberty print addict and I use it whenever I can. I have always thought that there is a massive gap in the market for gorgeous, unique lampshades so I want to show you how you can use your favourite fabric to turn a boring, plain lampshade into something really special. This is an easy, inexpensive project and it doesn't take long to do - the best kind of project in my book!
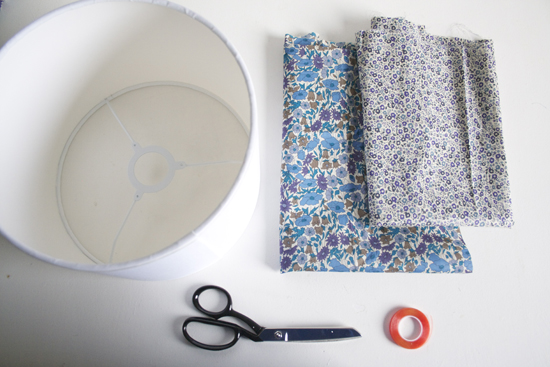
You will need:
Double sided fabric tape
Scissors
Plain lampshade (any shape or size)
Lightweight cotton (the lighter in colour the fabric, the more light will be released from your shade). I have used Liberty’s Poppy and Daisy for the main part of the shade and Fairford for the trim.
The amount of fabric you will need will depend on the shape and size of your shade.
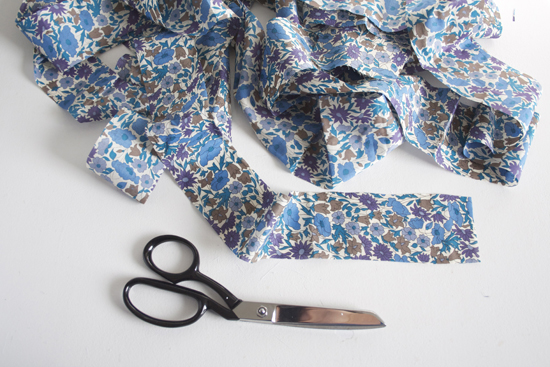
Step one: Cut your main fabric in to long strips that measure 5cm in width.
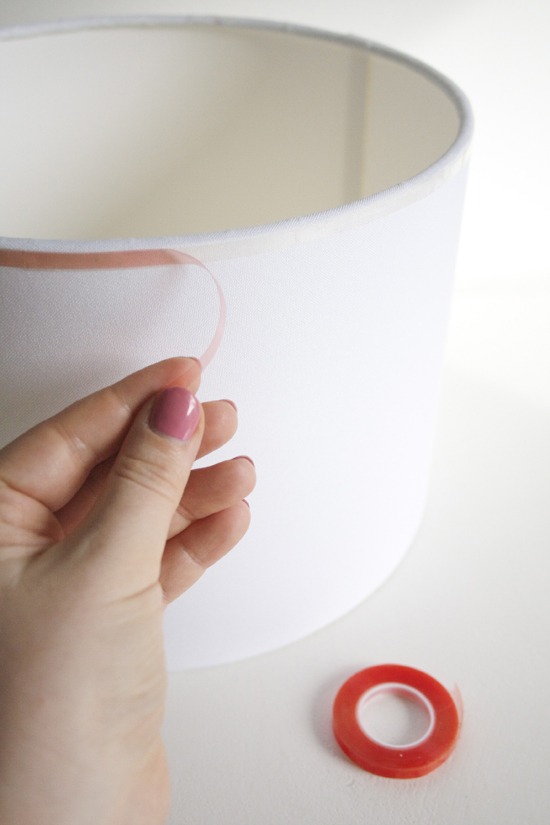
Step two: Stick a length of the double-sided fabric tape around the top edge of the shade on the outside.
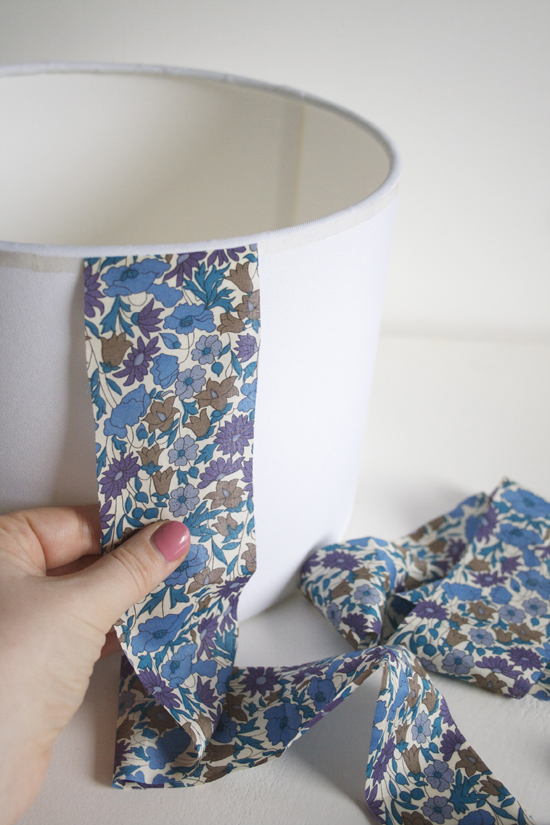
Step three: Begin by sticking a strip of fabric to the tape at the top of the shade on the outside.
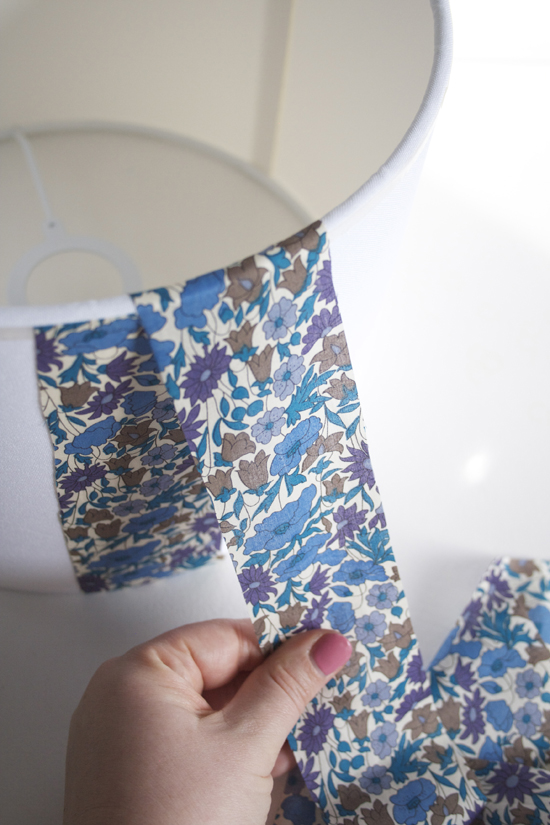
Step four: Wind the strip down the outside of the shade, under the bottom, up the inside and back over the top. Continue winding the strip around the frame from left to right, overlapping each strip by about 2cm.
Step five: When you reach the end of the first strip cut it so it ends at the top on the inside of the shade. Add a piece of tape here and stick it down.
Step six: Add a new strip to the top on the outside of the shade and continue the process. Always start and finish a strip at the top as this will be covered by a trim.
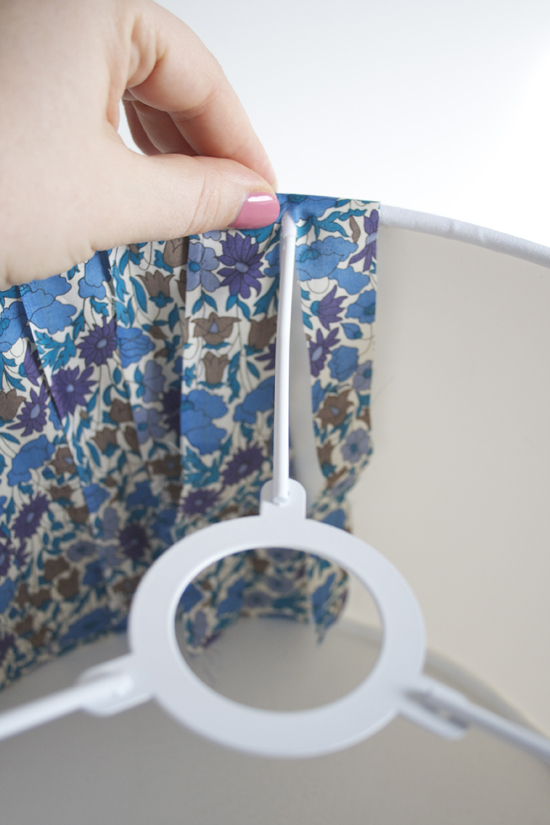
Step seven: When you reach a strut, make a slit in the fabric so it will fit around the strut.
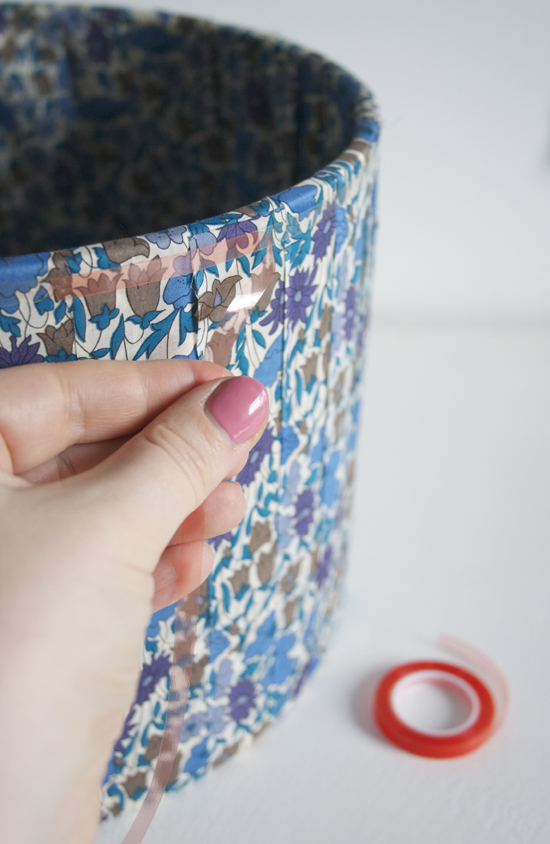
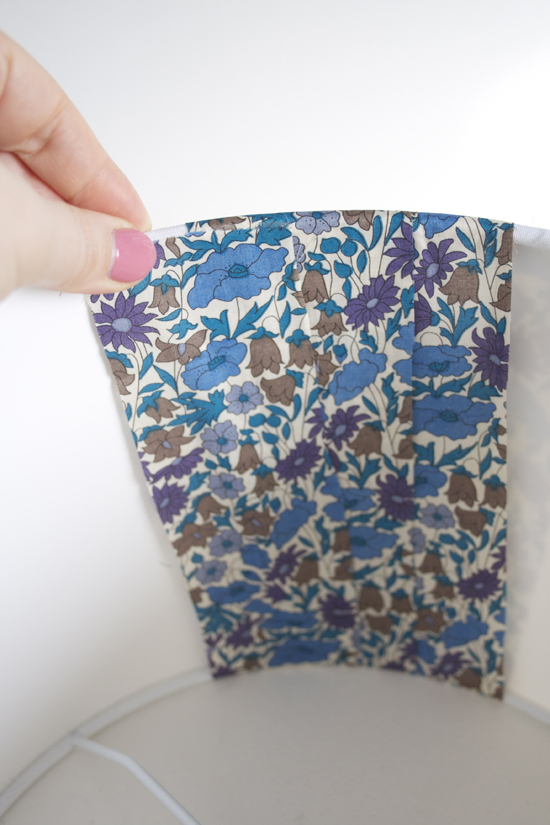
Step eight: Add another length of the double sided tape around the top and bottom edges of the shade on the outside and inside.

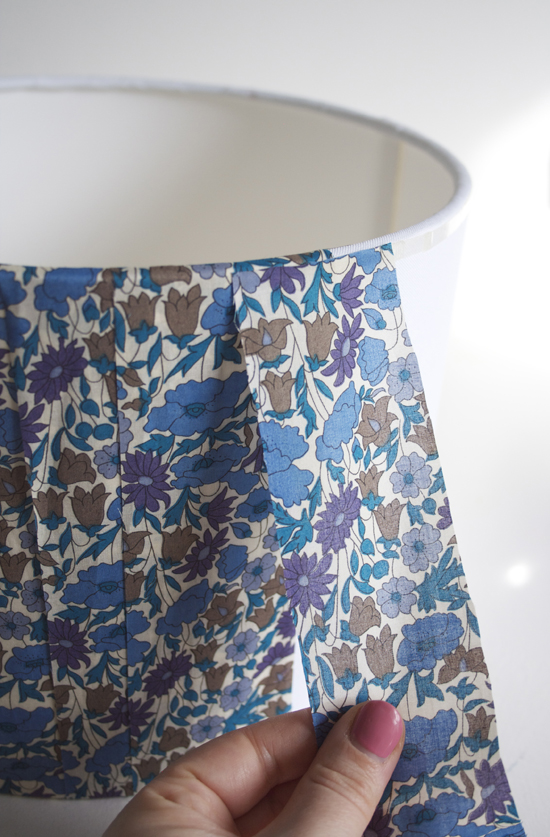
Step nine: Either with a matching or contrasting fabric make a trim to cover the top and bottom edges of your shade. It should be the length of your shade’s circumference and 5cm wide. Press 2cm over on both sides.
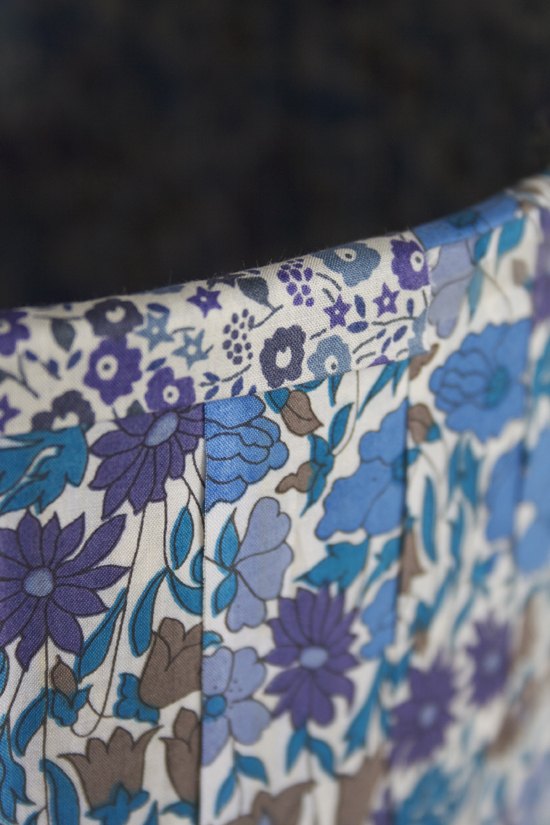
Step ten: Stick your trim over the top and bottom of the shade.
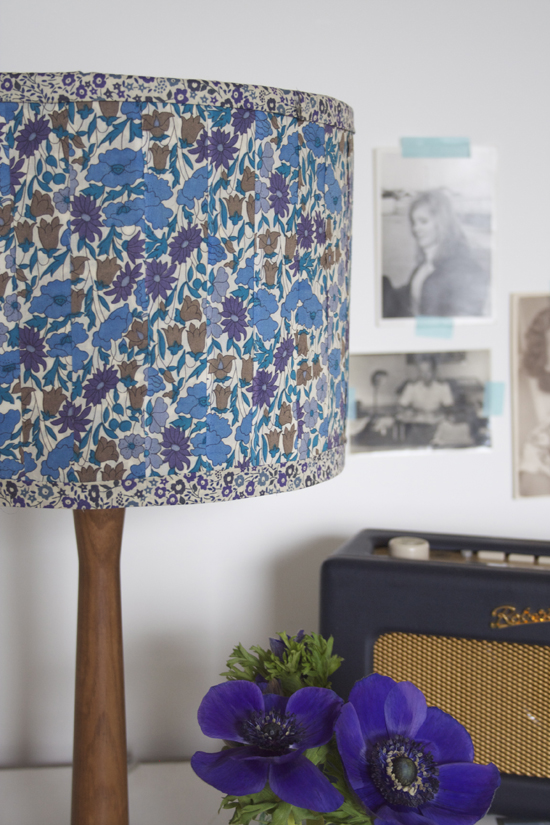
You’re done! I hope you enjoy your beautiful, custom-made lamp shade.
So cute!! I’m totally inspired to upgrade my own lampshades. And because there isn’t any glue involved, I think the fabric would come right off without damaging the lampshade if you decide you want to change it up later.
If you liked this project, be sure to head over to Apartment Apothecary, check out Katy’s lovely blog, and say hello!


Awesome! Such a Clever girl Katy. Really like what you've done here xxxx
You did an amazing job! Thanks for the inspiration.
This is such a fun way to change up a space! LOVE that fabric!
Yes! I love that fabric too.
This is GORGEOUS! I can't believe how easy it looks to make too. So long boring lamp shades :)
Right? No sewing...I'm in!
One can do no wrong with Liberty :D Love this DIY, Aileen, and looks so easy!
True indeed! I love it, too. Katy did such an amazing job.
Love this! Thank you for sharing.
Love this! Super cute idea!! Also love the vintage pictures on the wall!
Yes, they're so sweet!
Such a great idea!
Wonderful tutorial - this is a really unique way of covering a lampshade I have never seen before. Lovely result!
This looks beautiful but wouldn't the inner fabric need to be treated with a flame retardant?
I absolutely love this shade& really needed this tutorial. I have so many lampshades that i really want to redo.
I could find no one who knew how to replace a lampshade.and your tutorial was excellent. Thank you, Tammy Wood
Hello I Thank you so much for posting its so cute and scrumptious looking I cant wait to have a go myself. Im in love with the Liberty print also. :)
Love this and can't wait to do it. Thanks so much for the idea
Hi, lovely project but how to you cut the fabric so that the edges aren't fraying?
I don’t suppose this could be done with a stripe fabric?
This is a great idea, I’ve got a lampshade that got paint on it. Roughly how much fabric do you need for say a 40cm diameter lampshade?