26
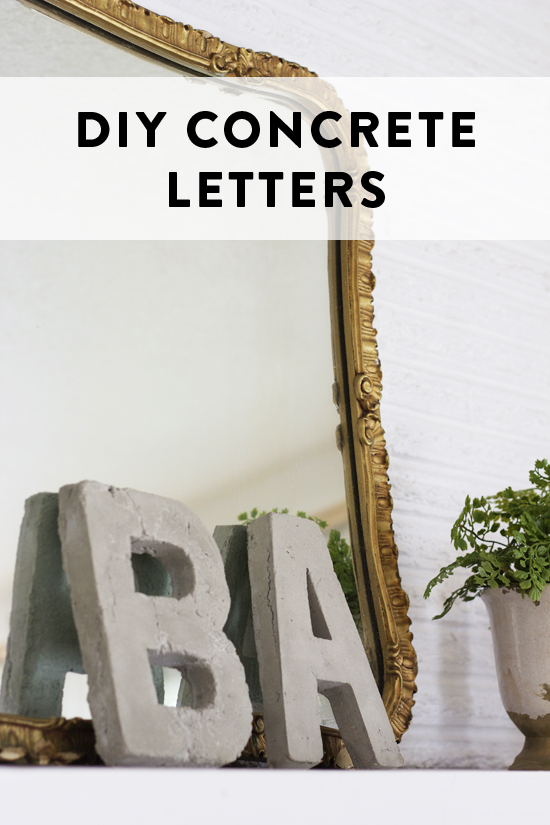
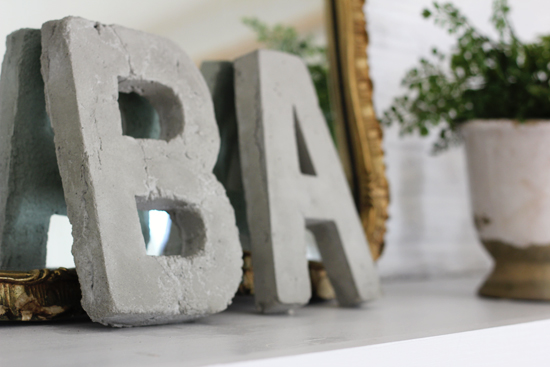
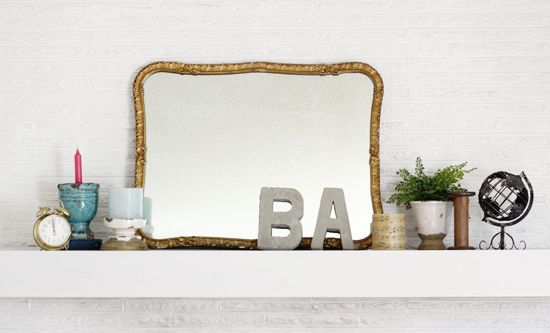
While I was working on the concrete magnets that I shared last week, I also busted out a few other concrete projects. One of them was these DIY concrete letters! I've had the B and A letters that I used as molds for a long time--you can get them at most craft stores for about $3. We had ours on the mantel for awhile, but I was never really in love with the way they looked. So when I came across this tutorial, using those same cardboard letters to make concrete versions, I knew that would be the perfect way to upgrade them!
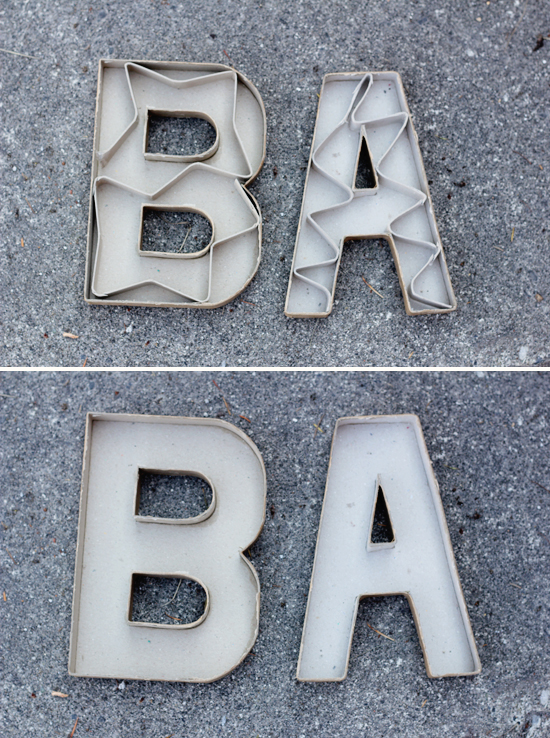
The instructions are really so simple. Use a box cutter to remove the bottom of each letter. If it's symmetrical, then it doesn't matter, but if you have an F or something, you'll want to be sure that you're removing the side you don't want to face out. There will be an accordion folded strip of cardboard inside--take that out.
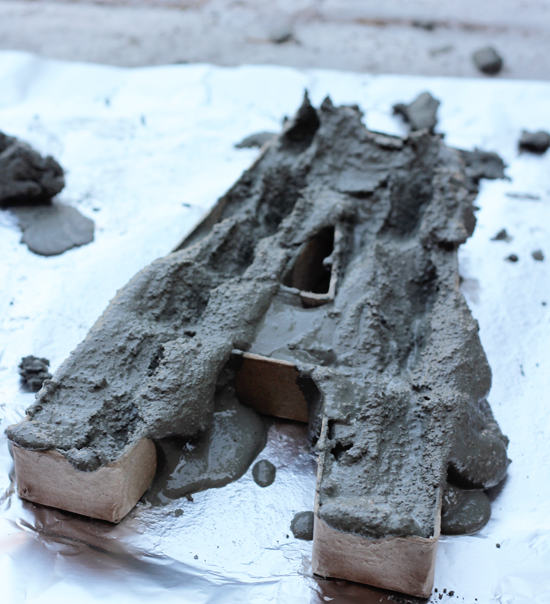
Mix the cement according to the directions on the package, then scoop it into your letters. We put some tinfoil underneath them, because this part is a bit messy. Pick your letter up and gently drop it a couple times or shake it around to make sure the cement reaches every corner.
Smooth out the cement and wipe away any areas with cement spilling over the sides. Now, wait for the cement to fully dry and harden (following the directions on the package). Be patient! When it's fully set, peel away the cardboard mold and discard it.
That's it! Isn't that easy? I love how these turned out. The B is a little rough because we had already made all the magnets and the A, so the cement was already starting to set up a little by the time we got to it. The funny thing is, I actually really like how it looks messy and rustic! So if you want a rougher look, mix your cement to be a little thicker. If you prefer a smoother finish, make it a little more runny and use it right away.
Craft stores also sell cardboard numbers, if you'd prefer (table numbers for your wedding, perhaps?). My sister-in-law Ellen made some using this same method--see her tutorial here.
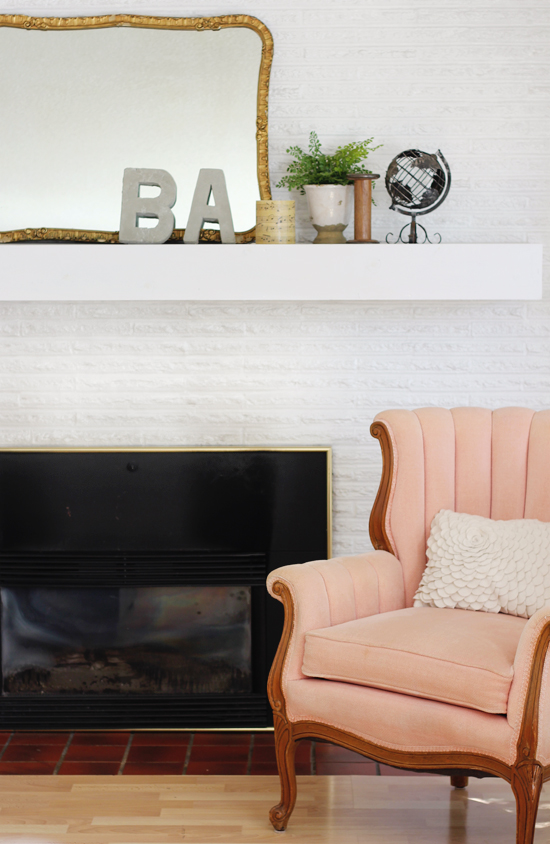
What do you think of my concrete letters? They remind me of the zinc letters that Anthropologie sells, but a little more unique and a lot less expensive!
By the way, if you've ever wondered what the difference between cement and concrete is, I found out for you (because I was curious too): Cement is the powdery substance that comes in the bag. When you mix it with water and aggregate and let it set, it hardens into concrete. So there you go!
Have you tried a cement/concrete project yet? It's really such an easy material to work with, not to mention inexpensive. You should try it!


i'd totally want to then paint them! they're awesome though. just saw similar sized metal letters at anthro for a fortune
kw ladies in navy
That's funny, I usually always want to paint my projects too. I love color!
Another great project. The masculine B should be a bit rough! :)
I know, I was thinking that too. Happy coincidence!
cute! I really like this!
Thanks, Amy!
This is really clever, what fun. Love the way they turned out!
Great idea! thanks for sharing!
http://www.etsy.com/shop/visualphilosophy
What a great idea! Who'd have thought something so simple could be so amazing! Love this!
How simple... and yet so amazing... need-to-make-some-NOW ;) And thanks for the info or the difference between cement and concrete - often wondered ;)
Great DIY ;)
Hello! Love this! Couple of questions (or logistics so to speak).. How tall are your lovely letters? And how much concrete did you use? Thanks!!
Hi Sarah! They're a foot tall (we bought them at Joann awhile ago). I'm not exactly sure how much concrete we used because we didn't measure...but we mixed the concrete in a small plastic bucket, which we filled it up about halfway. We still had a good amount of concrete left at the end, so you probably only need a few cups per letter. Hope that helps!
You are genius! I actually saw these for the 1st time yesterday at a boutique & they were missing 2 letters for what i needed. So i left disappointed. Stumbled upon your blog via google images! Thanks so much for the easy tutorial & idea!
Yay! So glad you found me, and have fun DIYing! Thanks for the comment.