25
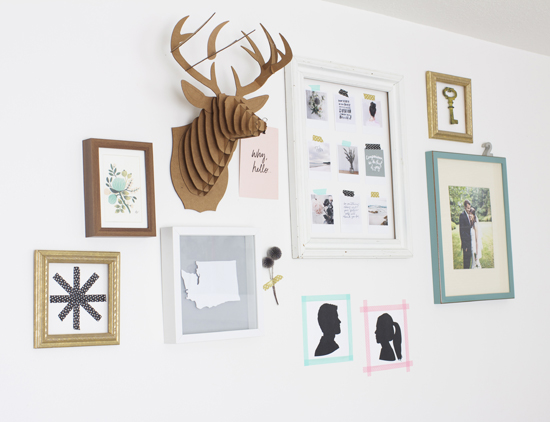
This is the one of the easiest projects I’ve shared on here so far. It’ll only take you about 5-10 minutes tops, and you probably have all the supplies needed at your house already: a printer, white paper/cardstock, tape, and a pair of scissors! Not only is it sooo simple, this idea is also really versatile. You can do the state where you live, like I did, or you could adapt this to any shape you please (hearts, animals, the silhouette of your kid’s head…a cloud, perhaps). You could even cut out letters to spell out a quote or a name!

The first step is to print out the outline of whatever it is you intend to cut out. I found a silhouette of Washington state to use as my template.
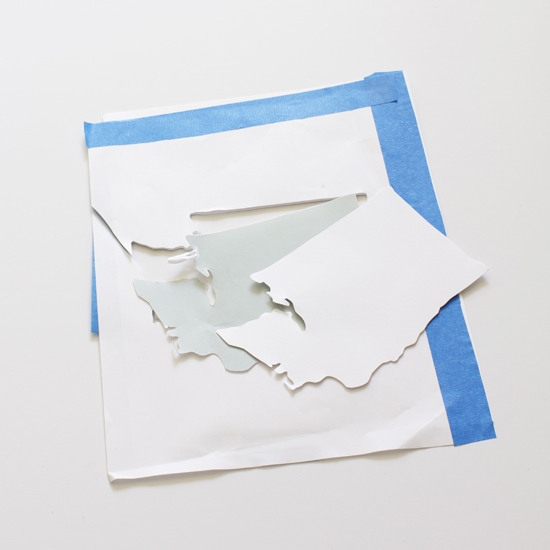
Next, tape a piece of white cardstock behind your printed template. Then, simply cut out the shape, making sure to cut through both layers (your template and the cardstock). Also, cut out a piece of paper the size of your frame (I used this extra deep frame from Ikea). I was originally going to use white paper for the background as well, but then I decided to go with this light gray. I still think tone-on-tone white would look really cool too!
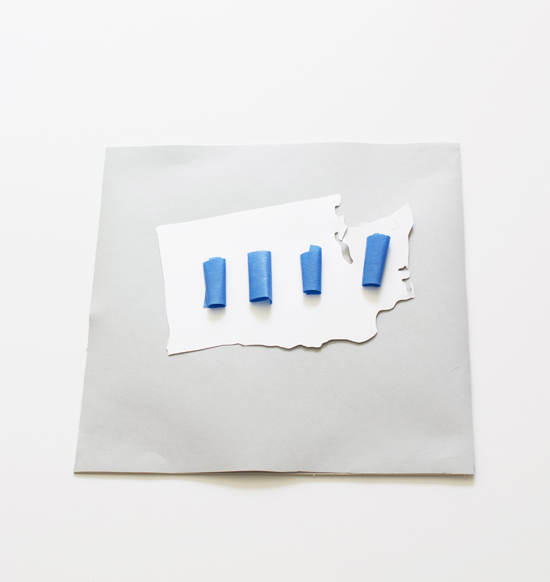
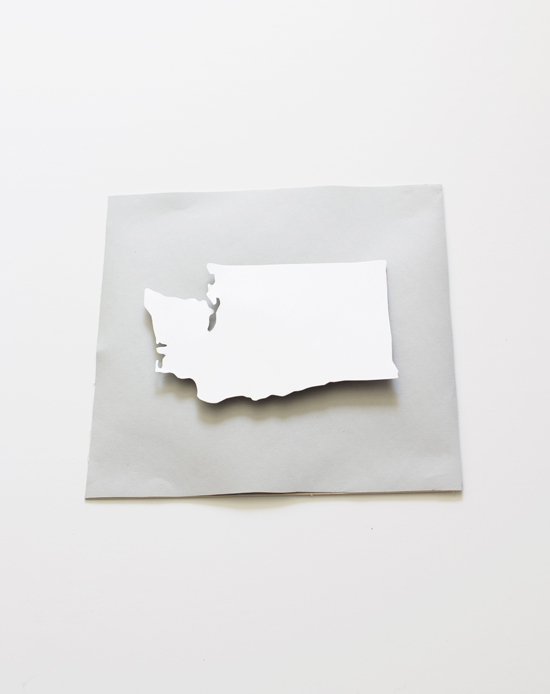
Once your shape and the background paper are cut out, turn the shape over and put a few loops of painter’s tape behind it. Turn it back to the front and press it lightly into the center of the background paper. You want it to be raised off the paper a little bit, so don’t press too hard.
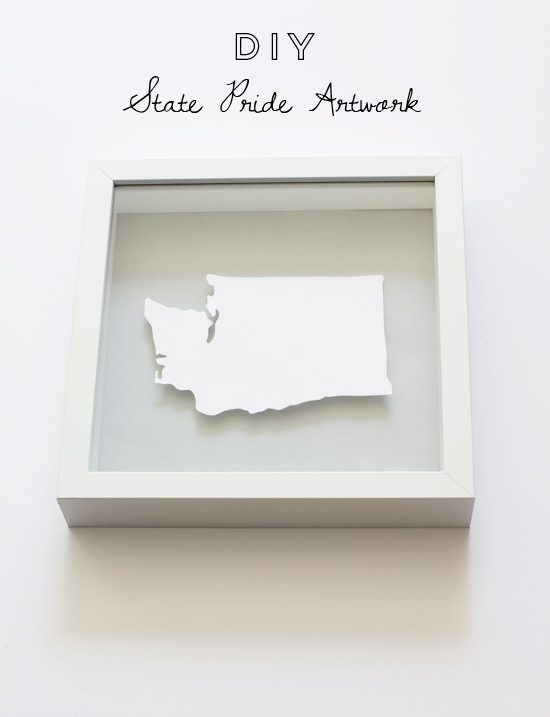
The last thing to do is to frame it and hang it up!
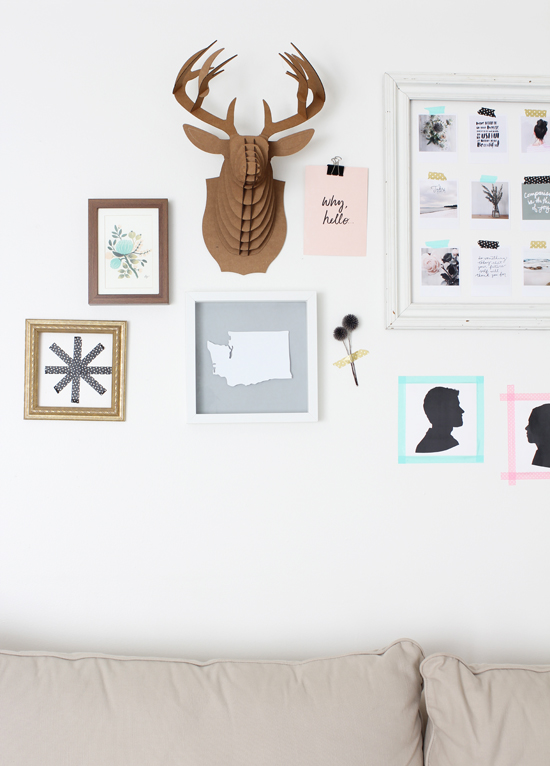
I think this turned out really well, especially for a project that was so quick and inexpensive.
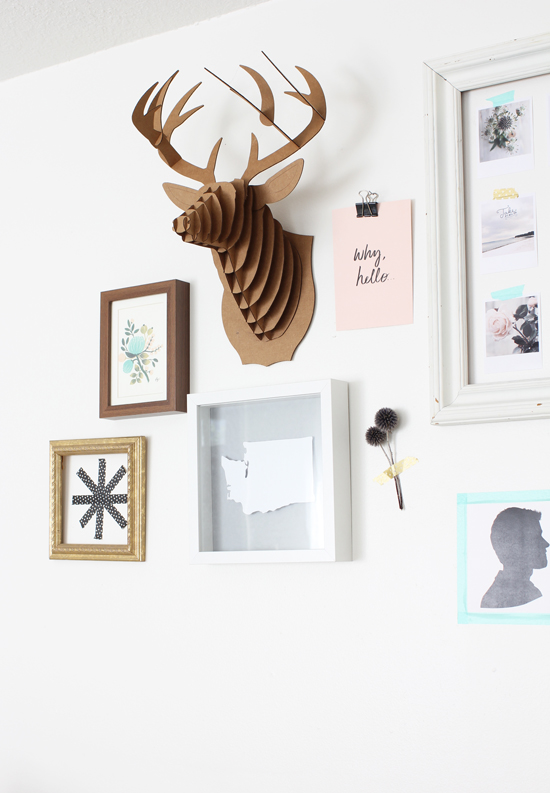
I really like how it has a little bit of dimension from being raised off the background paper--it makes it more special than just a printed silhouette.
Let me know if you try the same technique in your house! I’d love to see photos of your version(s).


I used to make this when I was younger with
Christmas cards c: Thanks for this DIY!
That paper deer looks pretty awesome! Xx
Oh fun! This would be great for cards.
this looks really fab! love the deep frame. that's the only piece of this project (well and tape and cutting skills and paper) that i'm missing! ;)
Thanks Kelsey! I love that deep frame too...I wish I would have picked up a few more the last time I was at Ikea.
Cute! Geography and I don't mix but I would love to see some cute children's hand prints!
Ooh I LOVE that idea, Debbie! How cute. Or footprints!
Such a cute and simple idea!
Thanks, Taylor!
Super cute and easy! Love those type of projects!
Thanks Amy! My favorite type of project, too ;)
I love your website and I love your ideas! The frame with the washi-taped photos is brilliant. Do you ever have trouble with the washi tape unsticking itself from the wall? I can never get mine to stay long. Wondered if there is a trick.
Hi Daicia! No trick (that I know of)...I just used blue tape beneath the photos to hold them to the wall. The washi tape is more decorative.
What a simple and fun idea! I have been trying to re-decorate my walls lately, so I think I will be adding this for sure! Thanks for the post.
Thanks, Erika! I’d love to see a photo of how yours turns out :)
I've done something similar but used a map of the state/area to make a silhouette of a symbol related to the state (i.e. an anchor for Rhode Island, a crab for Maryland, a kangaroo for Melbourne)
Ooh very cute! I love that idea!!