31
This post is sponsored by Zabitat. All opinions are my own!
Believe it or not, this whole project took less than an hour--and we finished it a month ago. What took me so long was finding the time to take photos and write this post. January was a doozy of a month for us, including a terrible stomach flu rolling through the whole family (it was miserable). I have quite a few posts that I've been neglecting while we recover, and I'm excited to finally finish writing about them...starting with this DIY front door makeover! We worked with Zabitat, the same company we used to update our French doors back in August. They sell glass inserts for steel or fiberglass doors that allow you to simply replace the glass on your existing door for a whole new look--without the cost of actually buying a new door. I think it's just the smartest idea! Replacing the glass is a very quick, easy, and budget-friendly way to improve your curb appeal.
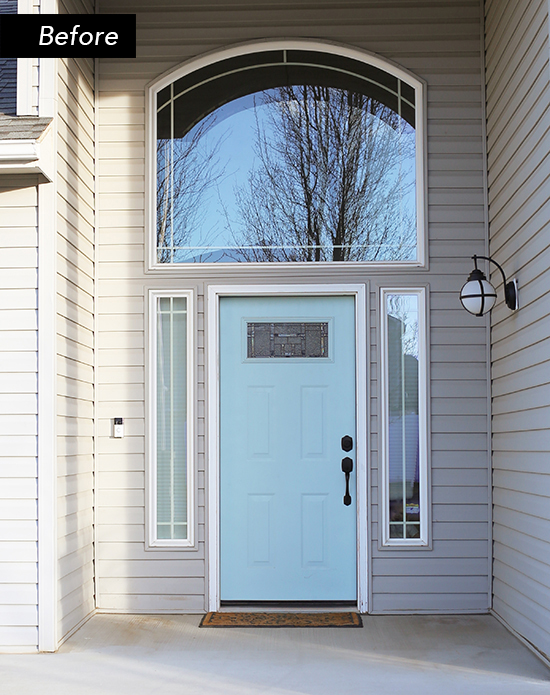
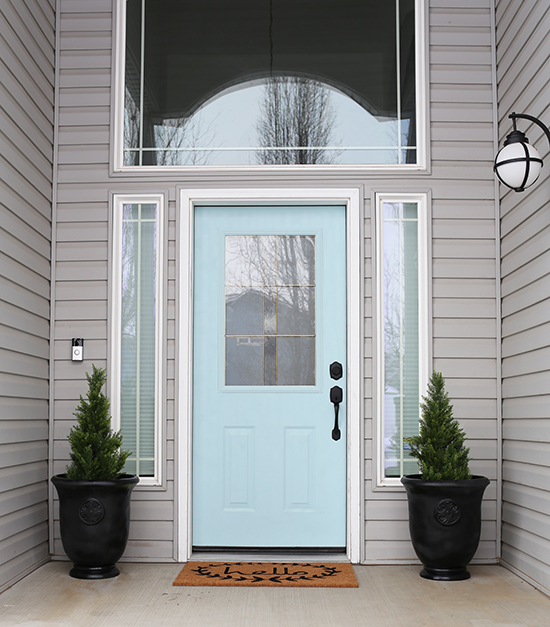
Our original front door had a small glass insert at the top, which was not necessarily what I would have chosen. Driving through our neighborhood and paying attention to other front doors, I realize it could have been a lot worse (those oval glass inserts in particular look really dated to me). However, once Zabitat mentioned the possibility of working together on a new front door insert, I just knew our door could be so much better. I looked through the options on their site and found some really beautiful inserts that would give our door a more modern, updated, distinctive look. These were my top three choices: one / two / three

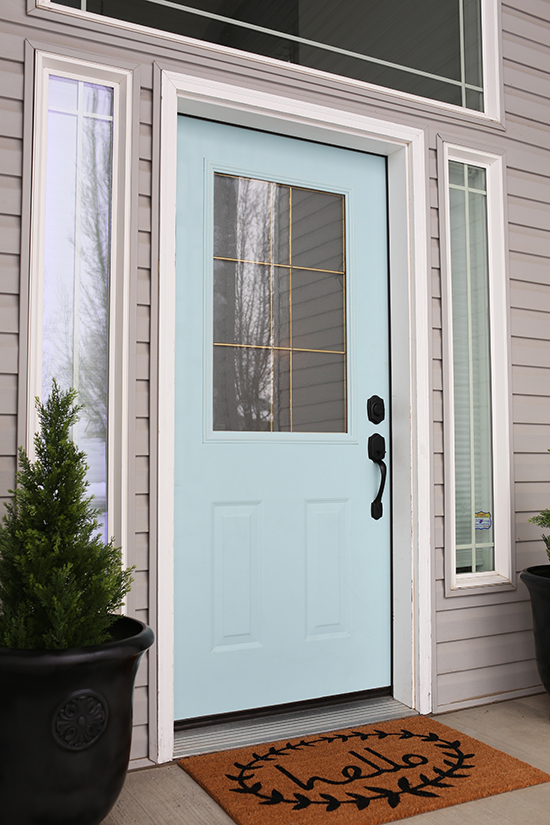
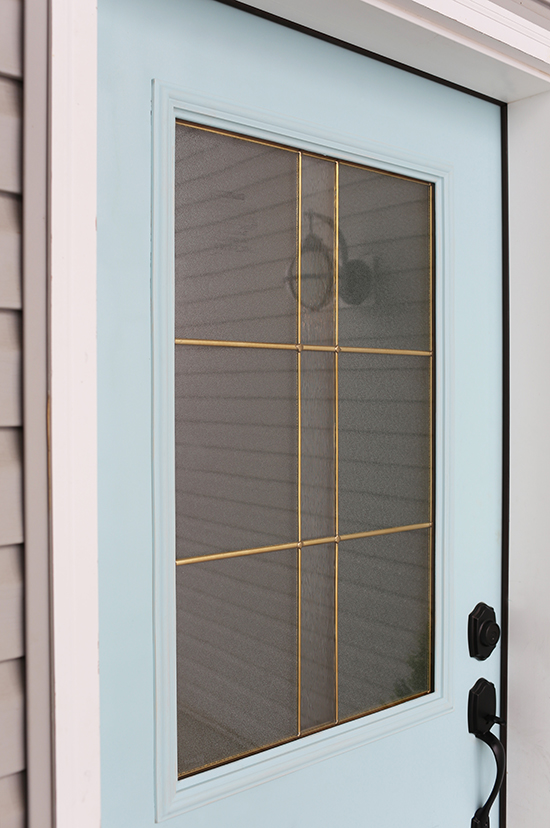
We ended up choosing #2: the Parkway frame kit. I loved the simple, elegant, modern design, and it seemed a bit more unique to me than the other two. We also appreciated that the glass is privacy glass with a Privacy Rating Level of 9. We were kind of scared to cut into our front door in the dead of winter (what if we messed up and were without a front door in the coldest part of the year?!?) but we carefully read the instructions and told ourselves we could do it.
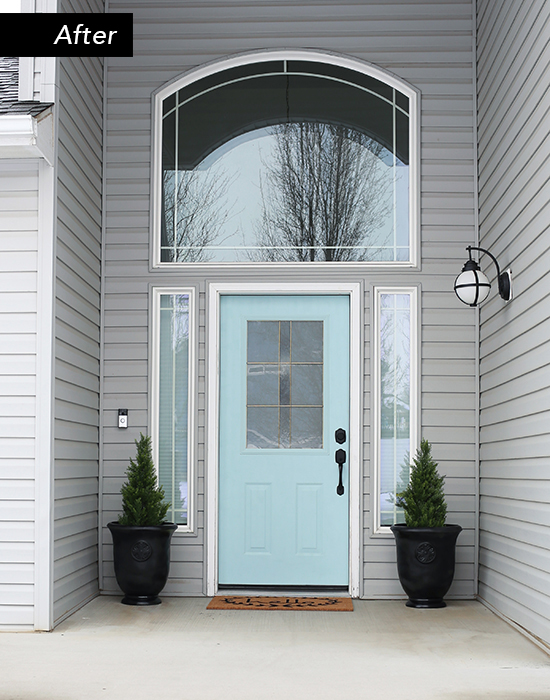
And we could!! Seriously you guys, this project is NOT that hard. We are not DIY experts by any means, and we did it by ourselves. I'll admit, it sounded very intimidating to cut a big fat hole out of our front door, but I'm so glad we gave it a try! It was just a matter of getting the right tools, and the rest was (relatively) easy. To complete the makeover, we bought a cute new doormat (the old one was actually left from the previous owners so it was definitely past its prime...haha!). I also found some planters on Facebook Marketplace, spray painted them black, and added some arborvitae bushes to flank our door and add some presence. If it kinda looks like we painted the door a slightly different color...we didn't. That's just the different lighting from two different days. I would say the after photos are a little more correct (if you like the color, it's Behr Malaysian Mist). We're actually thinking of repainting the door this spring, but we were worried that the paint wouldn't dry well with how cold it is right now. We'll see! I was contemplating a darker, more muted shade of greenish-blue. What do you think?
I didn't hate our door before, but I really looove the way it looks now. Before, it was "meh"...now, it's actually unique and pretty! It also lets much more natural light into our entryway, which is fantastic in these dreary winter months. If you're planning to sell your house soon, it's also worth considering that curb appeal, and in particular upgrading your front door, is one of the first things realtors always tell you think about...it's the first impression buyers have of your house. Spending a little time and money on a project like this can more than pay for itself!
So, how hard was it to do? You can read Zabitat's detailed instructions here, and watch some quick and helpful videos here. But I'll also show you some photos I took during the process. Hopefully they will give you confidence that total newbies CAN complete this successfully.
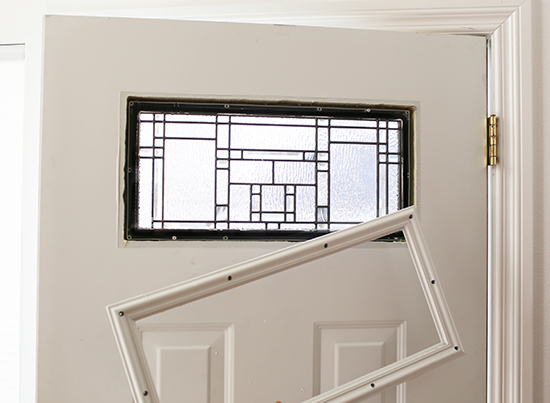
If you have an existing glass insert, the first step is to remove the screw plugs and attachment screws, then pop out the inner frame surrounding the glass. Then, using a putty knife, break the caulk seal between the outer frame and the door. Now, wearing safety glasses and gloves, you should be able to carefully remove the old door glass (ours just popped right out).
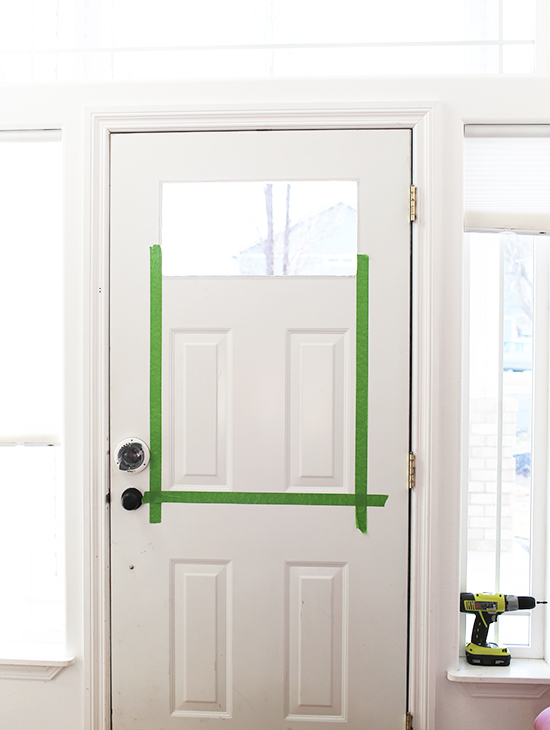
The next step is to measure and carefully mark off where the new door insert will go. If you have a standard door, this will actually be fairly easy: the half-lite inserts align with the bottom edge of the middle panels, and the full-lite inserts align with the bottom edge of the bottom panels. You can also get a new insert that's the same size as your old one, if you just want a new style. Then you don't have to deal with the next few steps!
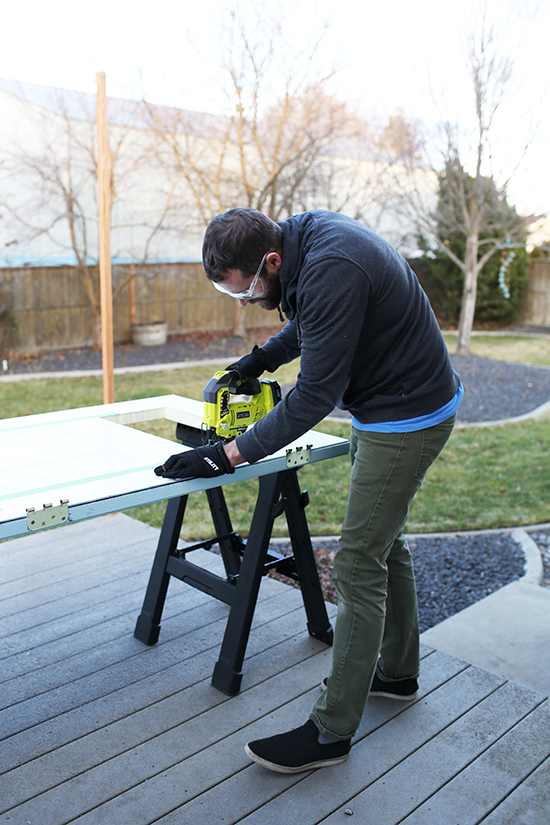
Now for the "scary" part! Remove the door, set it on sawhorses, and drill a small starter hole in each corner. Then insert a jigsaw with a short-stroke blade into the inner core of the door and cut along the marked guidelines, corner to corner. Only the very outer layers of the door are steel--the core is foam insulation--so you don't want to cut all the way through the door in one go. Instead, cut through the top layer of steel and about 1" into the foam, then flip the door over and repeat the process.
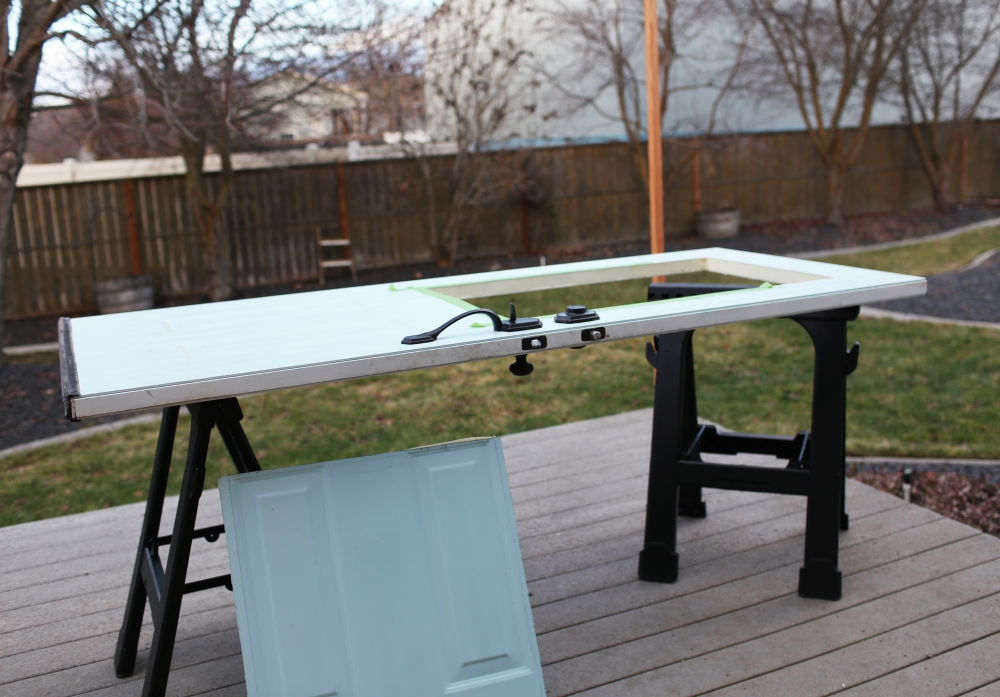
Boom! Done. All that's left is to place the new insert in the hole, place the frames on either side, and secure it all together with screws. We did this vertically with the door already in the doorframe, but it definitely took two people (one on each side). Zabitat actually recommends installing the door glass on the sawhorses, especially for the full-lite inserts. Since this part was a two-person job, I don't have any photos of it...but I'll leave you with one more pretty "after" photo!
What do you think of our front door updates? Other than the fact that we need to pressure wash? :P


I like such a door. The color is fresh shallow lotus green and the added glass makes it more beautiful.