01
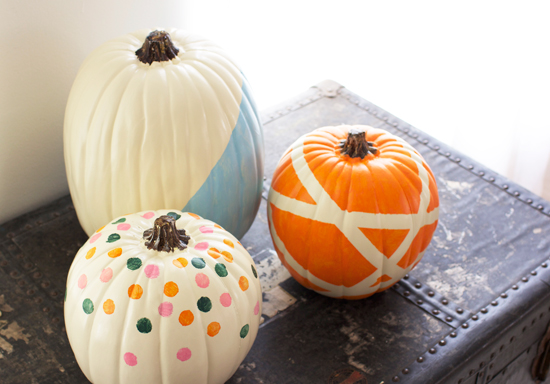
Hello, September! I can’t believe summer’s almost over. This year has just been flyyyying by. But we have lots of good things happening in the next couple months, so I’m excited. Both Ben and I just got new jobs, and our big Europe vacation that we’ve been planning is almost here (two weeks to go!!!). So, with all our life changes, it feels right that the season is changing too. There’s something about the transition to fall that always feels like a new beginning to me (it’s probably from years of starting a new school year every September)…and this year, I’m ready for it. In fact, I already started on my fall decorating, with some craft pumpkins from Michaels! They have a bunch of colors, shapes, and sizes for any project you might have in mind--including some fun half pumpkins that would be perfect for mounting on the wall. For our house, I decided to get some regular white pumpkins, and decorate them with some easy painted patterns.

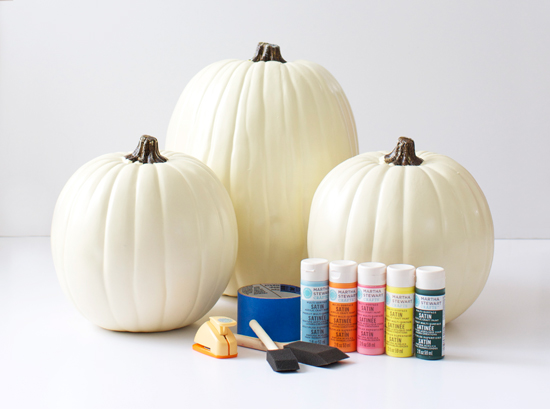
You will need:
White craft pumpkins (these are from Michaels)
Craft paint in various colors
Painter’s tape
Circle punch
Paintbrushes
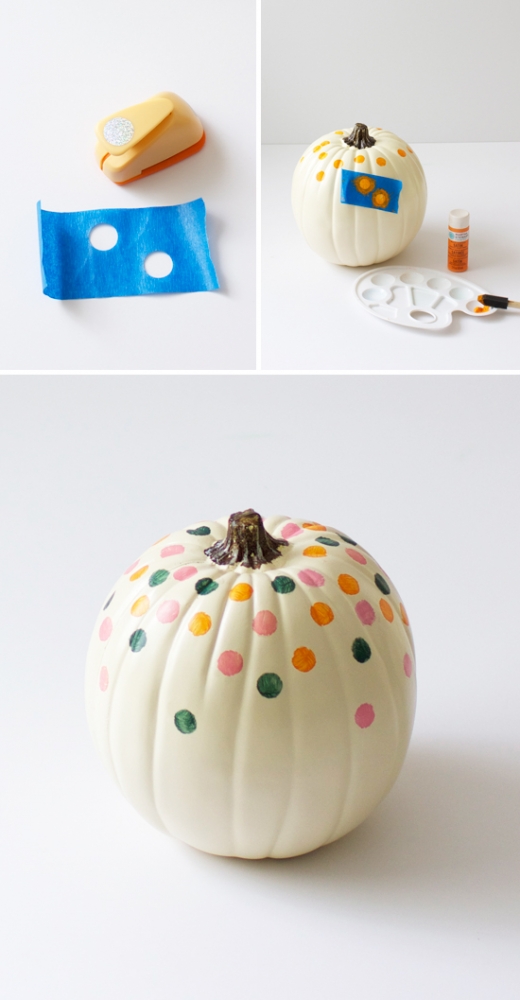
1. Polka dot pumpkin: The first pumpkin I painted (and probably my favorite) is this polka dot one. To make this yourself, punch some holes out of a strip of painter’s tape with your circle punch, then use those holes as stencils to paint dots on the pumpkin. Repeat with each color. I decided to make my polka dots more concentrated at the top and fade out toward the bottom. I like how they kind of look like confetti!
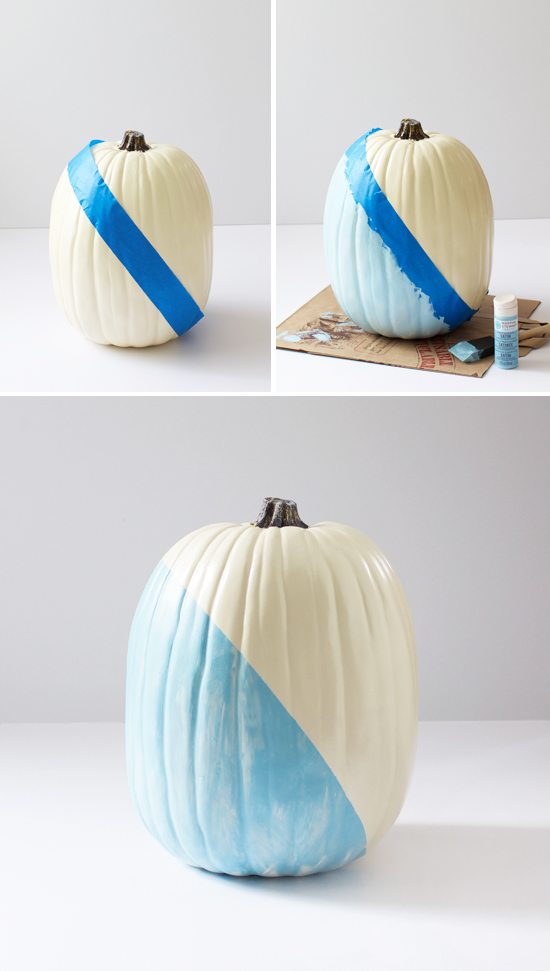
2. Diagonal half-and-half pumpkin: This is Ben’s favorite pumpkin, and it’s also the easiest to DIY. All you gotta do is tape a strip of painter’s tape diagonally around the entire pumpkin (like a toga!) then press it in place and paint the bottom half. Remove the tape, and admire your work.
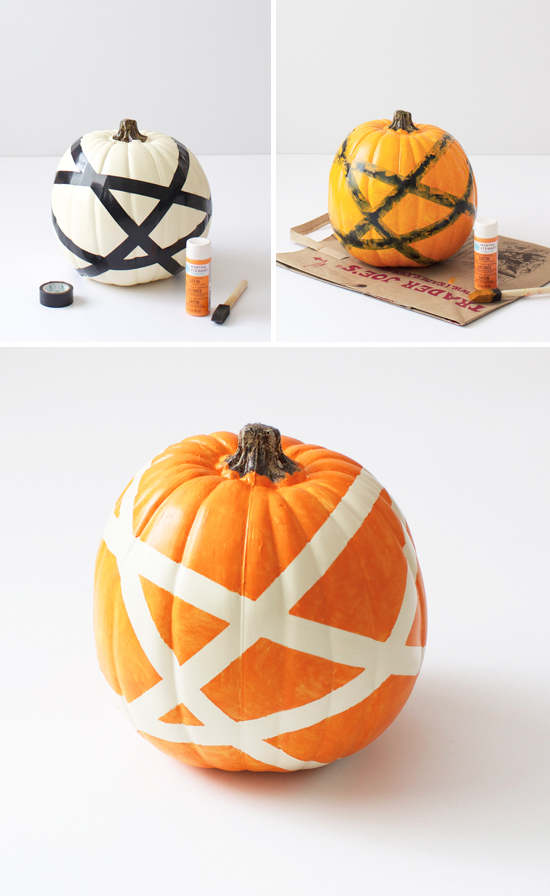
3. Criss-cross pumpkin: Last but not least, this criss-cross pumpkin is also super cute, and really easy to make. For this, you could use masking tape, washi tape, or whatever you have on hand--I used electrical tape because I already had a roll of it. Wrap the tape around your pumpkin in a criss-cross pattern, then paint the whole thing. Remove the tape, and you’re done!
I love craft pumpkins because you can use them year after year, and you don’t have to deal with the mess of carving. Plus, it’s fun thinking of different ways to paint them--there are SO many variations you could try! Which of mine do you like best?
If you’re looking for more fall décor inspiration, be sure to check out the 49 other DIY pumpkin projects from the rest of the Michaels Makers.
Thank you to Michaels for partnering with me on this post!


Yes, yes! Love these painting techniques. Now I need to go get 100 more pumpkins :)
Haha, thanks! I know, I'm so inspired by everyone's pumpkins. Definitely need to get me a few more too :)
You had me at polka dots and stripes. These are so pretty!
Thanks, Amy!
I like the polka dots :)!
Yay! My favorite too. No such thing as too many polka dots.
So cute. I'm planning on doing some painted pumpkin centerpieces for my baby shower in October, so I'm definitely going to keep all these ideas in mind!!
Yay! So glad you like them. Your baby shower sounds like it will be super cute!!! Hope you post pics :)
So so cute! Perfect combo of designs and colors, love.
Thanks Amy! :)